January 31, 2023

10 Creative Ways to Use Pixellab for Your Social Media Posts

pixellab for social media posts, social media posts design, pixellab tutorial

Pixellab is a most powerful graphic design tool for android device, it allows you to create stunning graphics and images for your social media posts. If you're looking to create an eye-catching Instagram stories, professional-looking Facebook posts, or engaging YouTube thumbnails, Pixellab provide you everything to make professional social media content.

In today's article, we are going to talk about "how can you use pixellab app for your social media posts" Below are best 10 creative ways to use Pixellab for your social media posts:

1. Create Instagram Stories

make Instagram stories with Pixellab, Pixellab app tutorial

Pixellab has a wide variety of templates and tools to help you create stunning Instagram stories. You can add text, images, and 3d animations to make your stories more engaging on your followers.

2. Design Facebook Posts

Pixellab tips and tricks, shamim editz, pixellab tutorial for beginners,

Pixellab's user-friendly interface makes it simple to create professional looking Facebook posts. You can add text, images, and other design elements to make your posts stand out.

3. Create YouTube Thumbnails

YouTube thumbnails are an important part of your youtube video's overall appearance. Pixellab allows you to create a custom thumbnails that are sure to grab the attention of your viewers.

4. Make Custom Instagram Feed Themes

With Pixellab, you can create a effective theme for your Instagram feed by designing an custom posts and stories. This can help to increase engagement and build a stronger brand presence on Instagram.

5. Design Event Posters

Pixellab is a great tool for designing posters for an events. You can easily add text, images, and other design elements to create a professional-looking poster that will grab the attention of your audience.

6. Create Custom Logos

logo design, facebook page cover photo editing, logo for facebook page

Pixellab's logo creator tool allows you to create a custom logo for your business or brand. You can choose from a variety of templates and design elements to make your logo unique.

7. Make Custom Memes

By using Pixellab, you can easily create a custom memes. You can add your own text, own images and own design to make a awesome & unique memes for your social media posts.

8. Design Custom Twitter Headers

twitter header design, shamim editz, pixellab tutorial for beginners

Pixellab allows you to create custom Twitter headers that will make your profile more creative and stand out. You can add text, images, and other design elements to make a eye-catching Twitter header.

9. Make Custom Facebook Covers

Pixellab can help you to create a custom Facebook cover that will make your profile more creative & unique. You can add custom text, images, and other design elements to make a professional looking Facebook cover photo.

10. Create Custom LinkedIn Posts

Pixellab can help you to create professional-looking LinkedIn posts or post template that will grab the attention of your audience. By using text, images, and other design elements you can make a professional LinkedIn post for your valuable audience.

Sort Tutorial for creating a professional looking social media posts with pixellab app.

For Creating eye-catching social media posts with Pixellab is a easy way. First of all, download the Pixellab app from the App Store or Google Play store. Then Open the app and select the "Create" button. 

From there, you can choose to start from a blank canvas or use one of the pre-designed templates. Once you have access your canvas or template, you can easily add text, stickers, and shapes to your design.

Remember: every social media posts for different social media network have a fixed size and template. By using Pixellab you can easily change your photo size or use pre made template for different types of social media network.

You can also adjust the size, color, and font of the text and stickers. You can also add your own custom images, logos, or branding elements by importing them from your device's gallery. Once you are happy with your design, save the image on your gallery, and share it to your social media platform by uploading it from your device's gallery. 

By using Pixellab, you can easily create a unique, stylish & professional looking social media posts that will capture the attention of your followers.

In conclusion, Pixellab is a powerful tool for creating an stunning & professional social media content. With its wide variety of in-built templates, tools, and design elements, it's easy to create professional looking graphics, logos, banners and images that will grab the attention of your audience. 

If you're a mobile content creator or you're looking to create Instagram stories, Facebook posts, or YouTube thumbnails, pixellab app help you to create a professional looking social media posts and i hope this article is helpful for you.

Labels: , ,

January 11, 2023

5 Essential Video Editing Tips for Beginners - Ultimate Guide

video editing, tips, beginners, professional-looking videos, editing process, video editing techniques, device for video editing

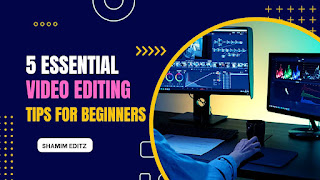
In this blog post, we'll be sharing our top 5 essential video editing tips for beginners. Whether you're new to video editing or simply looking to brush up on your skills, these tips will help you create professional-looking videos that are sure to impress. 

From choosing the right software to adding a soundtrack and creating smooth transitions, we'll cover everything you need to know to take your video editing to the next level. So grab a notepad and get ready to learn the ins and outs of video editing like a pro!

What is video editing?

Video editing is the process of taking raw footage and using specialized software to manipulate and rearrange it to create a new work. This can involve cutting and splicing footage, adjusting color and audio, and adding special effects. The goal of video editing is to tell a story, convey a message or present information in an engaging and visually pleasing way. The result of video editing is a finished video product ready for distribution on various platforms.

Video editing can seem daunting, especially for beginners. But with the right tools and a little bit of know-how, anyone can create professional-looking videos. In this post, we'll cover 5 essential video editing tips for beginners that will help you get started on the right foot.

1. Choose the right editing software

video editing, tips, beginners, professional-looking videos, editing process, video editing techniques, device for video editing

The first step to successful video editing is choosing the right software. There are a number of free and low-cost options available, such as iMovie for Mac and Windows Movie Maker for PC

For more advanced users, Premiere Pro and Final Cut Pro are popular choices. Take some time to research the different options and choose the one that best fits your needs and skill level.

Here are 5 of the best video editing software options available, based on features, ease of use, and overall quality:

  • Adobe Premiere Pro: Adobe Premiere Pro is a professional-grade video editing software widely used by industry professionals. It offers a wide range of advanced features, including motion graphics, color correction, and audio editing, making it suitable for a wide range of projects. it's widely compatible with other Adobe's software like After effects, which make it a powerful choice for advanced projects.

  • Final Cut Pro X: Final Cut Pro X is a professional-grade video editing software developed by Apple, it's available only for Mac users and is considered one of the best video editing software on the market. It has a wide range of advanced features, including magnetic timeline, which makes it easy to organize and edit footage.

  • DaVinci Resolve: DaVinci Resolve is a professional-grade video editing software that is available for free, it offers advanced color correction and audio editing tools making it a great choice for color grading and post-production work. It's also compatible with most cameras and file formats, and allows you to collaborate with other people on a project.

  • Avid Media Composer: It is a professional-grade video editing software that is widely used in the film and television industry. It offers a wide range of advanced features, including multi-camera editing and 3D editing, making it suitable for large-scale projects. It's also has a great workflow integration between different software like Pro tools, this makes it a perfect choice for big post-production companies.

  • Lightworks: It's a best free video editing software. It offers a wide range of advanced features, including multi-camera editing and 3D editing, making it suitable for more advanced projects. It has a user-friendly interface and a wide range of supported file formats, making it a great option for both beginners and experienced editors.

All of these software options are powerful and offer a wide range of features, but they also come with a steeper learning curve than more beginner-friendly options. It's important to research and try out a few different programs to find the one that best fits your needs and skill level.

2. Organize your footage

video editing, tips, beginners, professional-looking videos, editing process, video editing techniques, device for video editing

Organizing your footage is an important step in the video editing process. It can save you time and hassle in the long run, and help you create a more polished and professional-looking final product. Here are a few tips on how to organize your footage:

  • Create folders: Create folders on your computer or external hard drive and name them according to the type of footage they contain (e.g. "B-Roll," "Interviews," "Time-lapse"). This will make it easy to find the footage you need when you're ready to start editing.

  • Label your footage: Give your footage meaningful file names. If possible, include the date, location, and a brief description of the footage. For example, "Interview_JohnDoe_20210101" or "NewYorkCity_Timelapse_20210102"

  • Use color coding or tagging: You can also use color coding or tagging to help identify and organize your footage. Some video editing software allows you to assign color labels to your footage, while others may have a tagging system. This will allow you to easily sort and filter your footage according to your needs.

  • Use a backup: Make sure to backup all your footage in an external hard drive, cloud-based storage or other means of backup. Accidents happen, and it's important to protect your valuable footage by having multiple copies in different locations.

  • Keep it clean and organized: Keep your footage organized as you work, don't leave unnecessary footage or files in your working folders and delete the footage that you are not going to use. This will help you keep your workspace clean and easy to navigate.

By taking the time to organize your footage, you'll be able to edit your videos more efficiently and create a more polished final product. Remember that a little bit of upfront organization can save you a lot of time and headaches later on in the editing process.

3. Use keyframes to create smooth transitions

video editing, tips, beginners, professional-looking videos, editing process, video editing techniques, device for video editing

Using keyframes to create smooth transitions is an important technique in video editing. Keyframes are markers that allow you to control the speed and duration of a transition, which can be used to create a more professional-looking video. Here are a few tips on how to use keyframes to create smooth transitions:

  • Understand keyframe types: There are different types of keyframes, such as position keyframes, which allow you to move an object on the screen and rotation keyframes that allow you to rotate an object. Knowing the different types of keyframes available can help you make the most of this technique.

  • Add keyframes: To add a keyframe, you will typically select the transition point in your footage and then click the "Add Keyframe" button. This will create a keyframe at that point in the transition, which you can then adjust to control the speed and duration of the transition.

  • Control the speed: By adding keyframes, you can control the speed of a transition. For example, if you want a transition to start off slow and then pick up speed, you can add a keyframe at the beginning of the transition and then add another keyframe later in the transition and increase the speed.

  • Control the duration: You can also use keyframes to control the duration of a transition. This allows you to make a transition longer or shorter depending on your needs.

  • Practice and experiment: Keyframes can take some practice to master, so don't be afraid to experiment and try different things. Play around with different keyframe settings and see how they affect the transition.

Using keyframes to create smooth transitions is a powerful technique that can help you take your video editing to the next level. By understanding how keyframes work and practicing different techniques, you'll be able to create professional-looking videos that are sure to impress.

4. Add a soundtrack

video editing, tips, beginners, professional-looking videos, editing process, video editing techniques, device for video editing, shamim editz

The right soundtrack can elevate your video and make it more engaging. Choose music that fits the tone and theme of your video. Make sure to also pay attention to sound design and effects to add depth to your video and make it more dynamic.

Adding a soundtrack to your video can enhance the overall viewing experience and make it more engaging. Here are a few tips on how to add a soundtrack to your video:

  • Choose the right music: Choosing the right music for your video is crucial. It should fit the tone and theme of your video, and also be appropriate for the target audience. You can choose music from royalty-free libraries or licensed music providers.

  • Set the right mood: The music you choose should set the right mood for your video, whether that be upbeat, emotional, or suspenseful. You can experiment with different genres to see what works best for your particular video.

  • Time it correctly: The timing of the music is important. It should start and end at the right moments, and match the rhythm of the video.

  • Use sound effects: Adding sound effects can also help to create a more immersive experience. A good practice is to use sound effects that are synchronous with the action taking place on the screen, like footsteps, door slams and more.

  • Adjust the volume: Make sure to adjust the volume of the music and sound effects so, that they are at the right level and don't overpower the dialogue or other important audio.

  • Use Music and sound effects sparingly: Overuse of music and sound effects can be overwhelming, and distracts the viewer from the action on screen. Use it strategically and avoid using it in every scene.

By following these tips, you can enhance the overall viewing experience of your video and make it more engaging. Remember that good music and sound design can elevate your video and make it stand out from the rest.

5. Take your time and be patient

video editing, tips, beginners, professional-looking videos, editing process, video editing techniques, device for video editing

Video editing can be a time-consuming process, and it's important to take your time and be patient when editing your videos. Remember, it's not about getting it perfect the first time around, it's about learning and growing as an editor. Here are a few tips on how to do this:

  • Plan ahead: Before you begin editing, take some time to plan out your video. Decide on the overall structure and flow, and make a rough cut of the footage you want to use. This will help you to stay on track and avoid getting bogged down in the editing process.

  • Don't rush: Take your time when editing. Rushing through the process can lead to mistakes and result in a less polished final product. Give yourself enough time to make sure your video is the best it can be.

  • Take breaks: Video editing can be mentally taxing, so make sure to take breaks to avoid burnout. Take short breaks throughout the day to give your mind a rest, and make sure to take a longer break if you start to feel fatigued.

  • Be open to feedback: Be open to feedback from others. Showing your video to friends, family, or industry professionals can provide valuable insight and help you to improve your video.

  • Learn from your mistakes: Don't be discouraged by mistakes, they are a part of the learning process. Use them as an opportunity to learn and improve your skills.

By taking your time and being patient, you'll be able to create a more polished and professional-looking final product. Remember, it's not about getting it perfect the first time around, it's about learning and growing as an editor. And the more time you invest in the process, the more it will show in the final product.

What is the best computer for video editing

When it comes to video editing, the most important factors to consider when choosing a computer are processing power, memory, storage, and graphics capabilities. 

Here are a few things to keep in mind when looking for the best computer for video editing:

  • Processor: Look for a computer with a fast and powerful processor. Intel Core i9 or Xeon, or AMD Ryzen 9 are suitable options for high-end video editing. The more cores a processor has, the better it will be able to handle multiple tasks at once.

  • Memory: Look for a computer with at least 16GB of RAM, or even better 32GB, especially if you plan to use advanced features such as motion graphics and 3D compositing.

  • Storage: Look for a computer with a fast solid state drive (SSD) for the operating system and applications. A combination of SSD and hard drive is even better for storage of large video files

  • Graphics: Look for a computer with a dedicated graphics card, such as a NVIDIA GeForce or AMD Radeon. This will help ensure that your computer can handle the demands of video editing software and enable you to work with large, high-resolution video files.

  • Other features: Consider the peripherals you'll be using, such as an external hard drive, displays and other peripherals. Check the connections, ports and other connectivity options.

A high-end computer such as a Dell XPS or Alienware, or a professional workstation like the HP Z series or Dell Precision is.

Video editing can be a daunting task, but with the right tools and a bit of know-how, anyone can create professional-looking videos. By following our top 5 essential video editing tips for beginners, you'll be well on your way to creating videos that are sure to impress. Remember to choose the right editing software, organize your footage, use keyframes to create smooth transitions, add a soundtrack and take your time and be patient

The more you practice and learn, the better your videos will become. With these tips, you can turn your amateur home videos into polished, professional-looking productions. Have fun and enjoy the process of creating your own videos.

In conclusion, video editing is an essential skill for anyone who wants to tell a story, convey a message or present information in an engaging way. It involves the manipulation and rearrangement of video footage to create a new work, and can include cutting, rearranging, and splicing video shots, as well as adjusting the video's color, audio, and special effects.

It's important to choose the right computer and software for video editing, and to have a good understanding of the process, which starts by organizing and reviewing footage, continues by selecting the best shots and arranging them in a sequence, and proceeds by adding music, sound effects, and dialogue, color corrections, special effects, transitions, and titles. Finally, the video is exported and shared to the world.

By following these 5 essential video editing tips for beginners, you'll be well on your way to creating professional-looking videos. The more you practice and learn, the better your videos will become.

Labels: ,