Hello Friends 😍
Welcome to another article, in this article I will show you how to do High - End Skin Retouching In Photoshop.
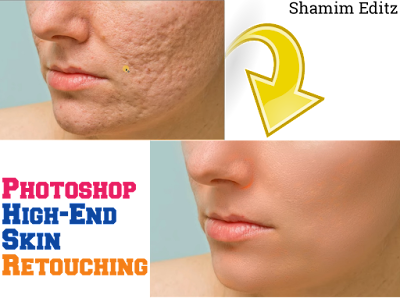
Look at the photo,
 |
| Photoshop High - End Skin Retouching Tutorial |
If you want to Smooth your photo like this, simply read this article & follow this steps. I hope you will be known a proper idea about Photoshop High - End Skin Retouching.
Skin Retouching or Skin Smoothing is most important for all of the photo editor. Face was the main part of a photo, so every professional photo editor edit a photos face properly carefully for a better output of his work.
Lets go & start this Photoshop Skin Editing Tutorial.
Follow The Simple Steps Below:
1. Copy your photo leyer.
.jpg) |
2. Chenge the copy leyer blending mode.
Follow this screenshot click on normal & select > vivid light.
.jpg) |
3. Then invert it useing (CTRL+I) this keyboard shortcut.
.jpg) |
4. Then go to filter
.jpg) |
Don't use High Pass with Higher level, Use it a little bit.
Or, adjust it according with your photo, if you see the skin of the edited photo are looking good then press OK.
I used for this photo - ( 32 )
.jpg) |
5. Then go again filter
.jpg) |
6. Then adjust with your photo.
.jpg) |
7. Then click this leyer and apply leyer mask
Then fill leyer mask with black color .
.jpg) |
8. Then go to color selection tool in your photoshop
9. Then take a normal brush in brush library in your Photoshop
.jpg) |
Adjust brush hardness > 0%
Then adjust opacity and flow > 100%
.jpg) |
10. Then paint/ brush your skin,
.jpg) |
If you do this process slowly and carefully you got a good result
.jpg) |
Photoshop Skin Retouching Tutorial is now finished. If you think this article was helpful for you, please write a small comment and motivated me to write a new post for you.
Thanks 👍